How to Create a Glitter Gradient Nail Art Design
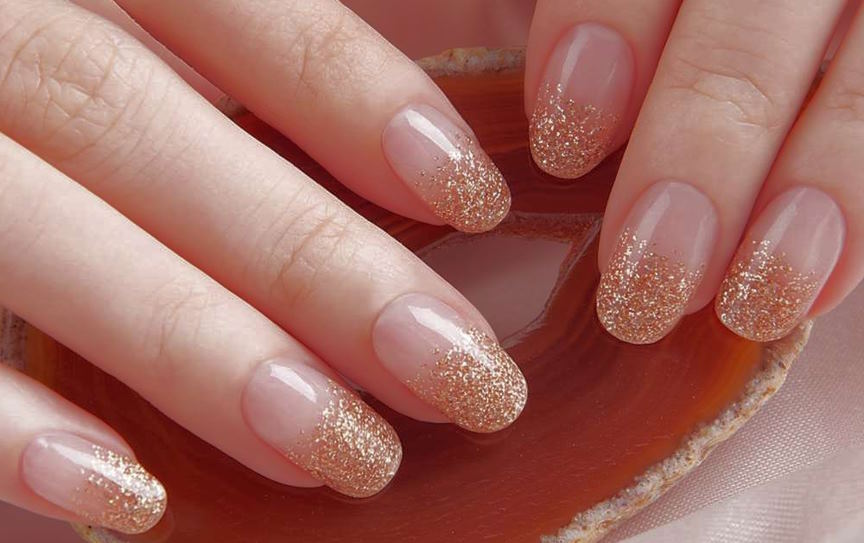
Nail art has become a popular way to express creativity and showcase personal style. One of the most popular nail art designs is the glitter gradient, which creates a stunning ombre effect using glitter. It’s a versatile design that can be customized to fit any occasion or outfit. While it may seem complicated to achieve, creating a glitter gradient nail art design can be done at home with the right supplies and techniques. We will go over step-by-step instructions on how to create a beautiful glitter gradient on your nails and share tips and tricks for making it last. Get ready to add some sparkle to your fingertips!
List of necessary supplies
To create a glitter gradient nail art design, you’ll need a few essential supplies. Before you start, make sure you have the following items on hand:
- Base coat: A clear base coat will help your nail polish adhere better and prevent staining.
- Nail polish: You’ll need two colors for your gradient, one for the base and one for the glitter. Choose colors that complement each other and blend well together.
- Glitter polish: You can choose any color or size of glitter you like. Just make sure it complements your base colors.
- Makeup sponge: A makeup sponge will be used to create the gradient effect on your nails.
- Tape or liquid latex: This will be used to protect the skin around your nails from getting covered in polish.
- Nail polish remover and cotton swabs: These will be used to clean up any mistakes.
When selecting your colors, keep in mind that lighter colors will make the glitter stand out more, while darker colors will create a more subtle effect. If you’re not sure what colors to choose, try sticking to a monochromatic color scheme, or choose colors that are opposite each other on the color wheel for a bold contrast.
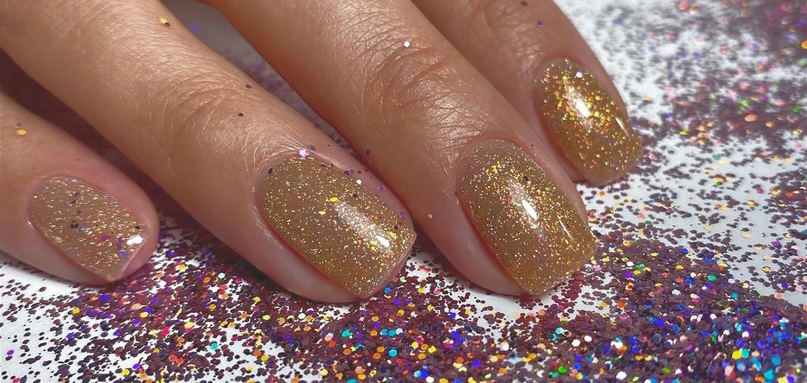
When selecting your glitter, think about the overall look you want to achieve. Chunky glitter will give a more textured look, while fine glitter will create a smoother gradient. You can also choose a glitter that has multiple colors or shapes for a unique effect.
Creating the Glitter Gradient
Creating a glitter gradient nail art design may seem daunting at first, but with a few simple techniques and some patience, you’ll be able to achieve a stunning and professional-looking result. Here’s how to create the gradient effect:
- Apply your base color: Apply your chosen base color to your nails and let it dry completely.
- Prepare your sponge: Cut a small piece of a makeup sponge and apply a thin layer of glitter polish to it.
- Dab the sponge onto your nails: Using the sponge, gently dab the glitter polish onto the tips of your nails. Start by dabbing the sponge near the tips and work your way up to the middle of your nails. Make sure to blend the glitter polish with the base color to create a smooth gradient effect.
- Repeat the process: Repeat steps 2 and 3 until you achieve the desired level of glitter coverage and smoothness.
To achieve a smooth transition between colors, make sure to blend the base color and glitter polish thoroughly. Dab the sponge gently and evenly to prevent clumping or smudging.
Here are a few tips to help you avoid clumping and smudging:
- Use a thin layer of glitter polish on the sponge to prevent overloading.
- Allow each layer to dry completely before adding another layer of glitter polish.
- Use a clean sponge for each nail to prevent transferring too much polish from one nail to the other.
- Use a brush to clean up any mistakes or excess glitter.
Variations and Customizations
While a glitter gradient nail art design is already stunning on its own, there are many ways to customize and add your own personal touch to it. Here are some variations and customizations you can try:
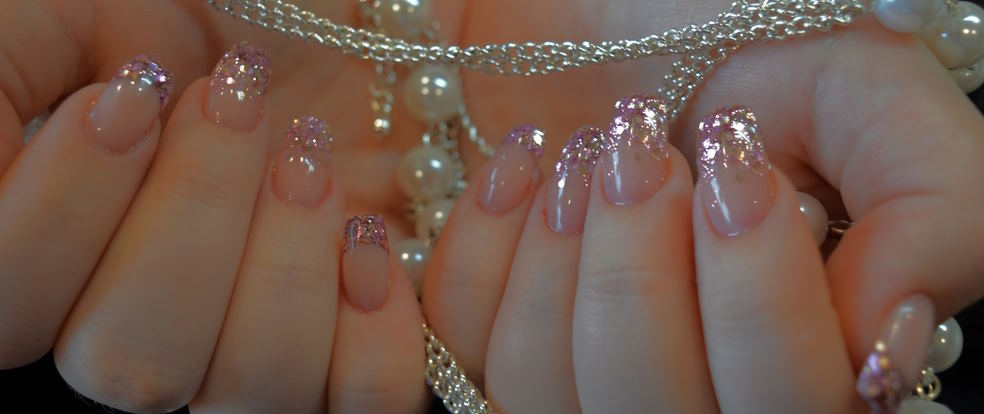
- Change up the design: Instead of applying the glitter only to the tips of your nails, try applying it to the base of your nails for a reverse gradient effect. You can also try applying the glitter diagonally across your nails or creating a glitter ombre effect by blending two different glitter colors.
- Add embellishments: You can add embellishments like rhinestones, studs, or decals to your glitter gradient design for an extra pop of glamour. Apply them with a clear topcoat to ensure they stay in place.
- Experiment with color combinations: Instead of using traditional glitter colors like gold or silver, try experimenting with different glitter colors like pink, blue, or even rainbow. You can also try different base color combinations like black and white, or pastel colors for a softer look.
- Mix and match textures: Instead of using only glitter polish, try mixing in some other textures like metallic or matte. You can also try layering different glitter sizes or shapes to create a more dynamic look.